How to setup The SonarQube in a Docker Container on Local Machine on Windows 11?
SonarQube is an open-source platform designed for continuous inspection of code quality. It provides tools for static code analysis to identify code issues, measure code quality, and track code complexity. SonarQube supports a wide range of programming languages, making it versatile for diverse software development projects.

Key features of SonarQube include:
- Static Code Analysis
- Code Quality Metrics
- Security Scanning
- Support for Multiple Languages
By using SonarQube, development teams can proactively identify and address code quality issues, resulting in improved maintainability, reliability, and security of their software projects. It plays a crucial role in supporting the principles of continuous integration and continuous delivery by providing feedback on code quality throughout the development lifecycle.
How to setup the SonarQube in a local machine?
- We need Docker Desktop for Windows to setup the SonarQube local.
- Download and install Docker Desktop for Windows.
- Open the Powershell and check if the docker is installed or by running the below command.
docker info
- Run the below command to download and install the "SonarQube" image. The command will download and install the "SonarQube" image if not already present in the local image store in your machine and run the container with the "SonarQube" image.
docker run -d --name sonarqube -e SONAR_ES_BOOTSTRAP_CHECKS_DISABLE=true -p 9000:9000 sonarqube:latest
- You can check the image and container in Docker Dashboard.
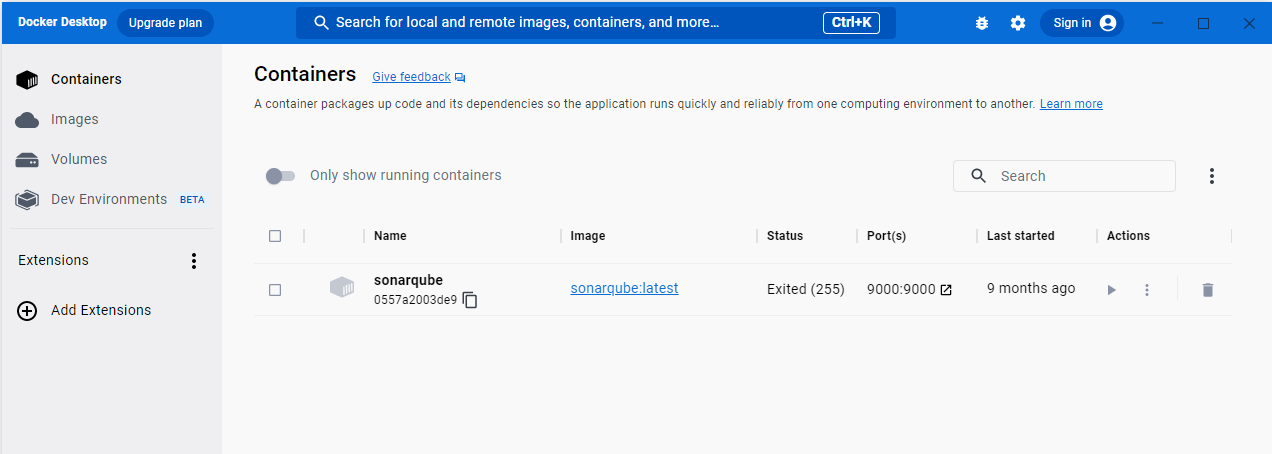
- You can check the image and container in Docker Dashboard.
- Once done with the all above steps, then "SonarQube" is running in http://localhost:9000 now. Launch SonarQube portal in http://localhost:9000.
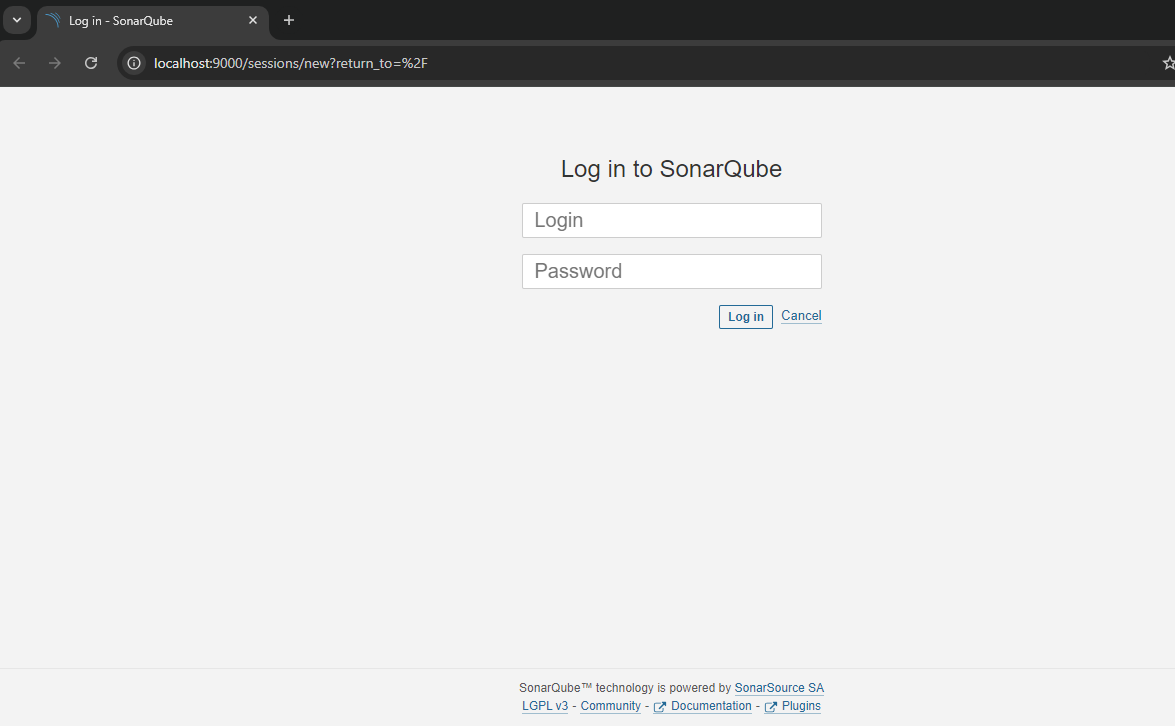
- The default login credential is admin/admin.
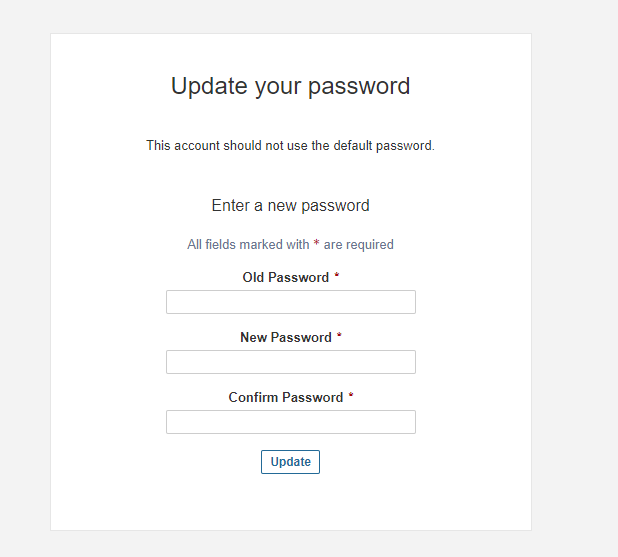
- The Change password screen will display for the first-time login. Set your own password for the SonarQube portal.
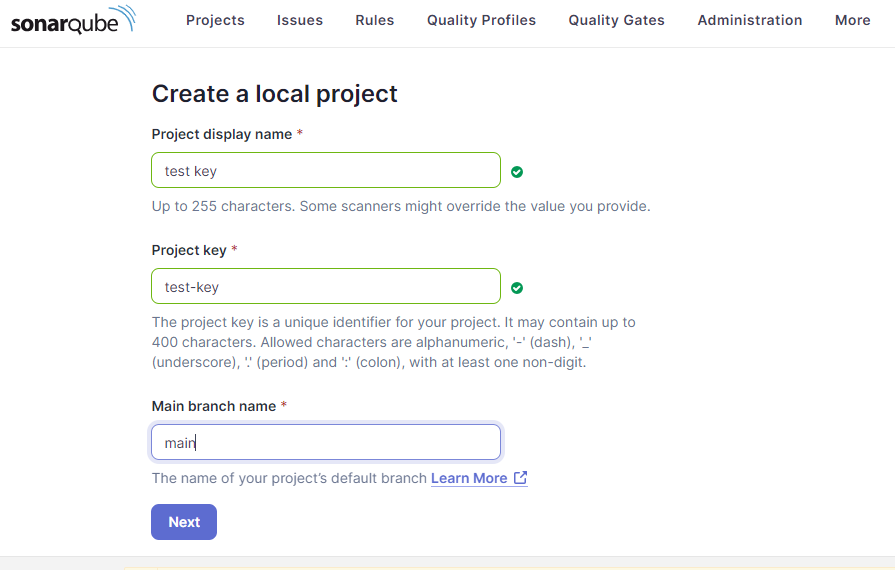
- Select the "Create a local project" option. (If you want setup SonarQube with GitHub or another platform then select that option).
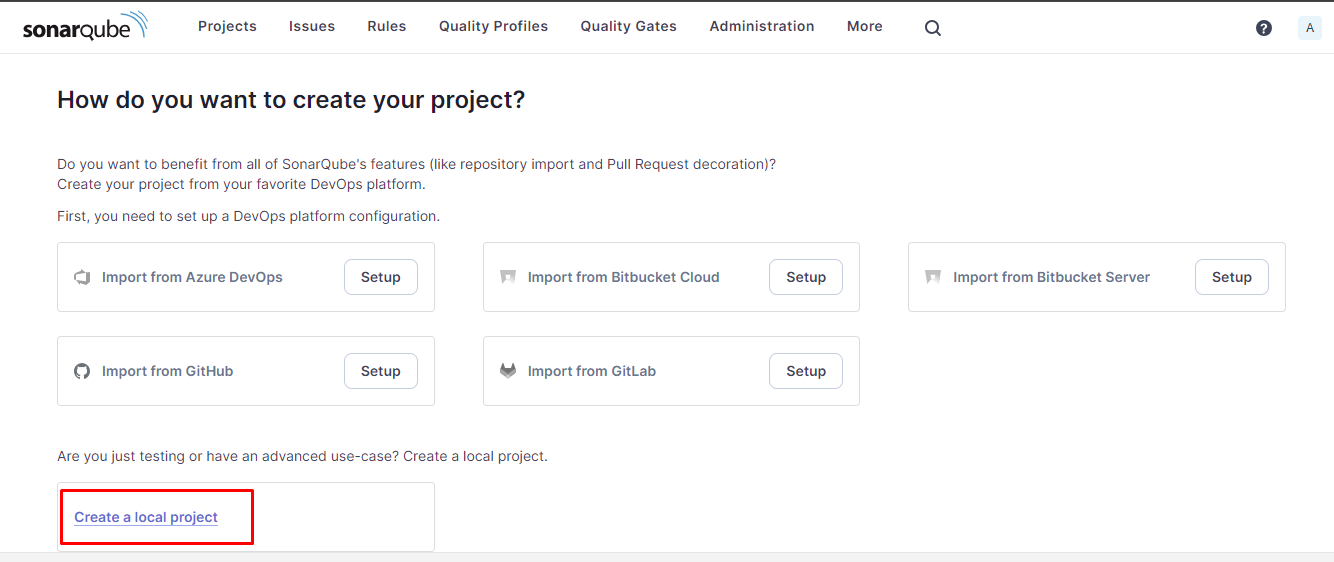
- Enter the "display name" and "key" and click "Next".
- Now select the "Use the global setting" option.
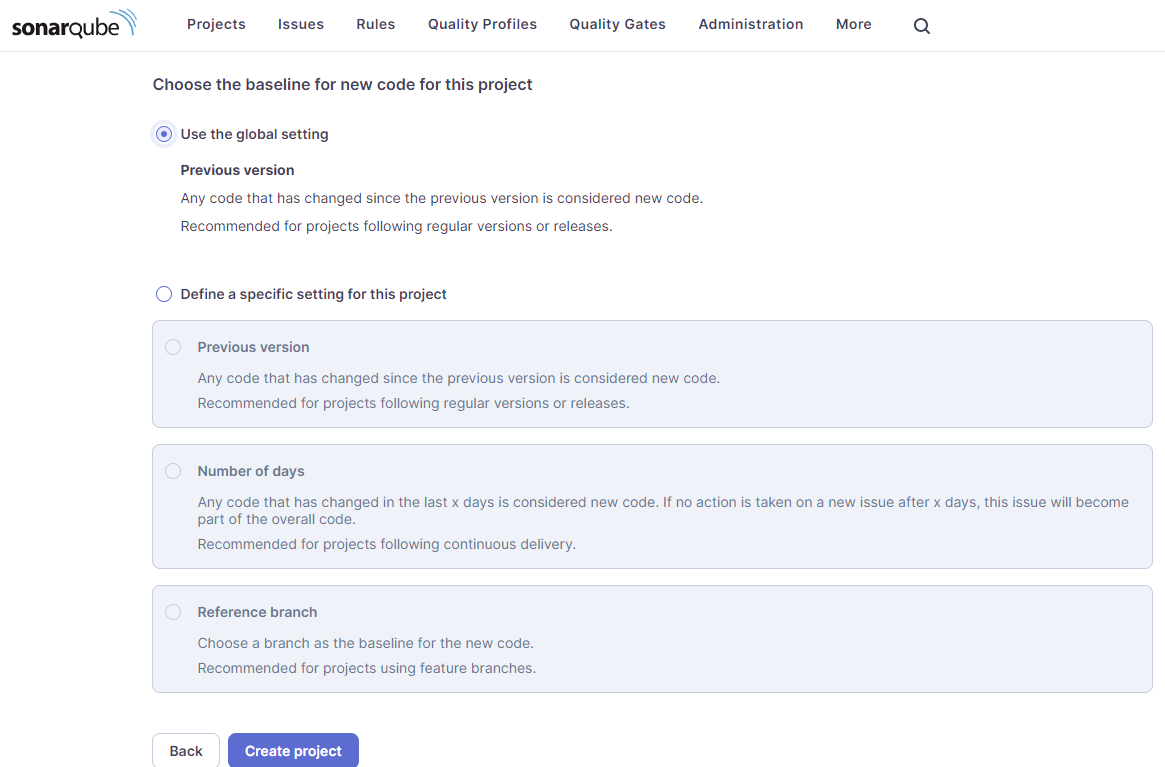
- Click the "Create project" button.
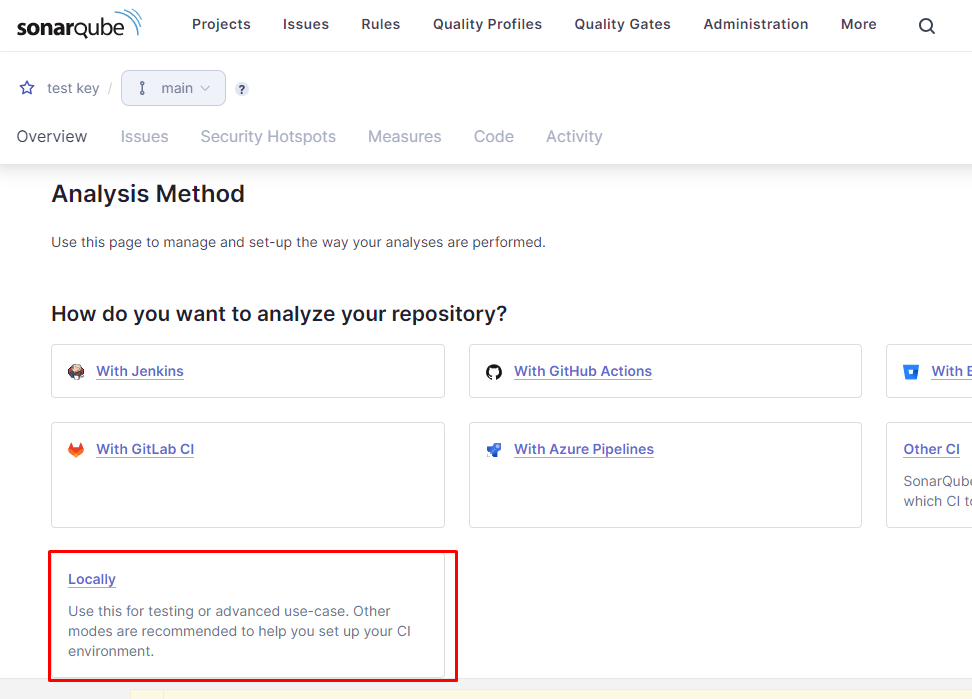
- Now choose "Locally" option in the above page "Analysis Method".
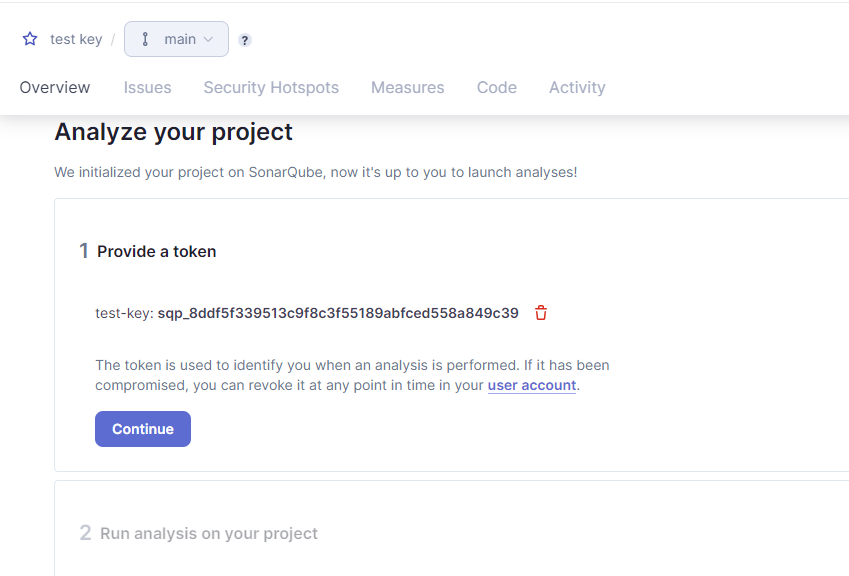
- Enter the token name and click the "Generate" button. You will get the sonar token.
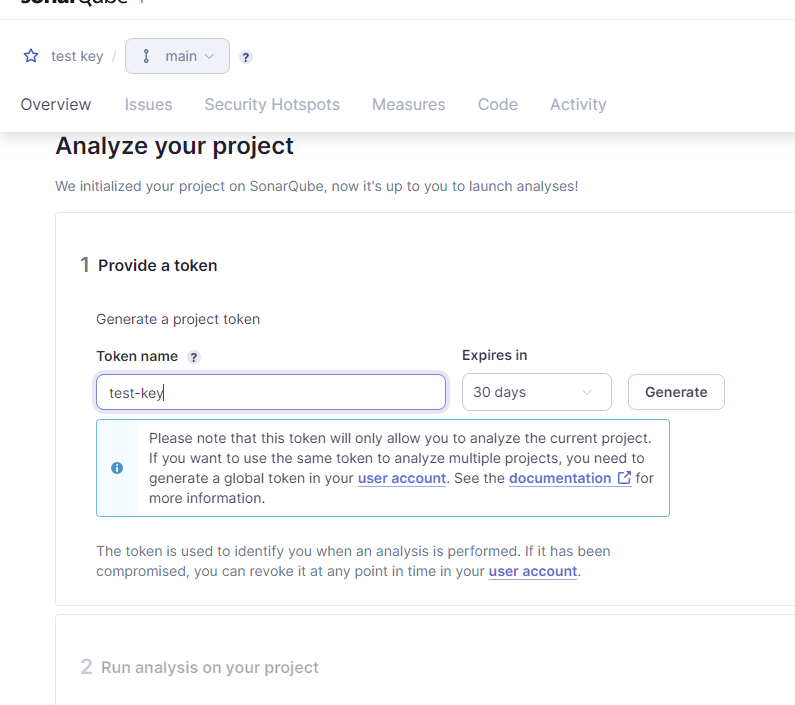
- Save that token and Click "Continue"
- Choose your project language.
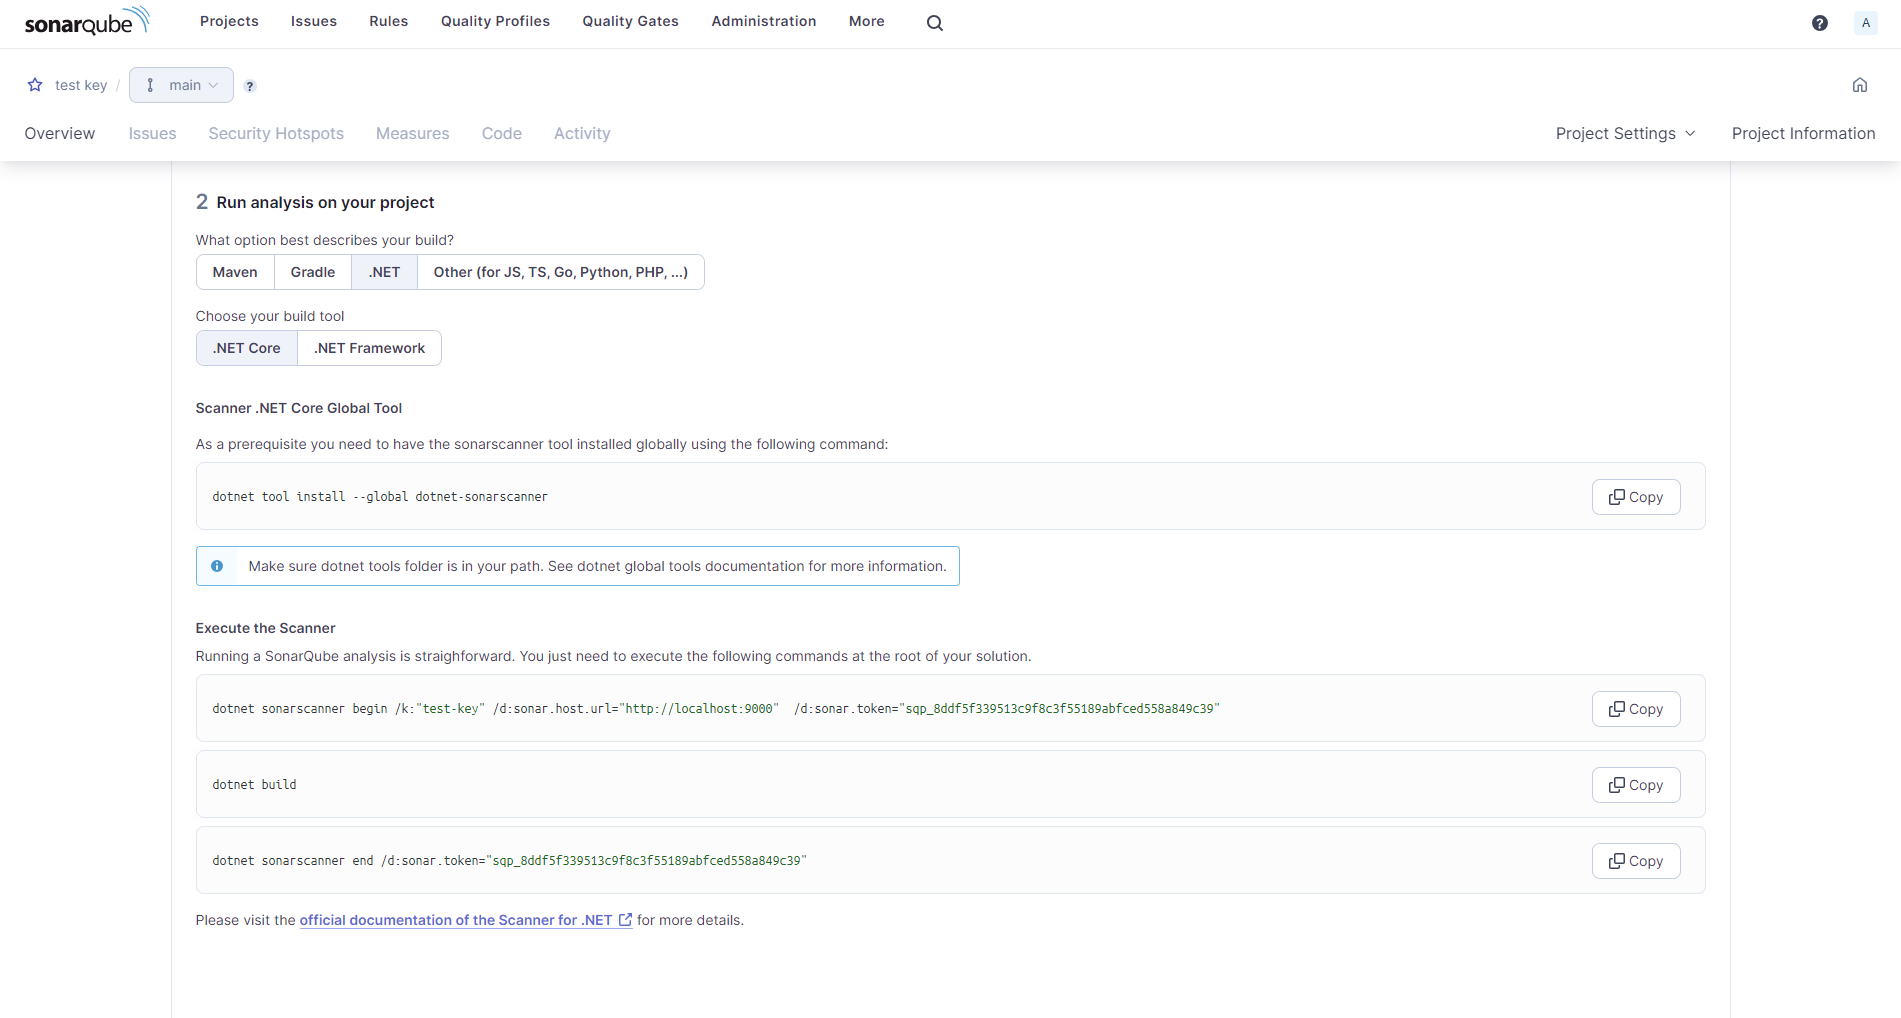
- Now we need to have the sonarscanner tool installed globally using the following command:
dotnet tool install --global dotnet-sonarscanner - Running a SonarQube analysis is straighforward. We just need to execute the following commands at the root of our solution.
dotnet sonarscanner begin /k:"test-key" /d:sonar.host.url="http://localhost:9000" /d:sonar.token="sqp_8ddf5f339513c9f8c3f55189abfced558a849c39"
- Dotnet build
dotnet build -
Execute following command to end analysis
dotnet sonarscanner end /d:sonar.token="sqp_8ddf5f339513c9f8c3f55189abfced558a849c39"
- The sonar report will automatically infer the project name from your code. i.e., the final report will not have test-key as the project name but your actual project name.
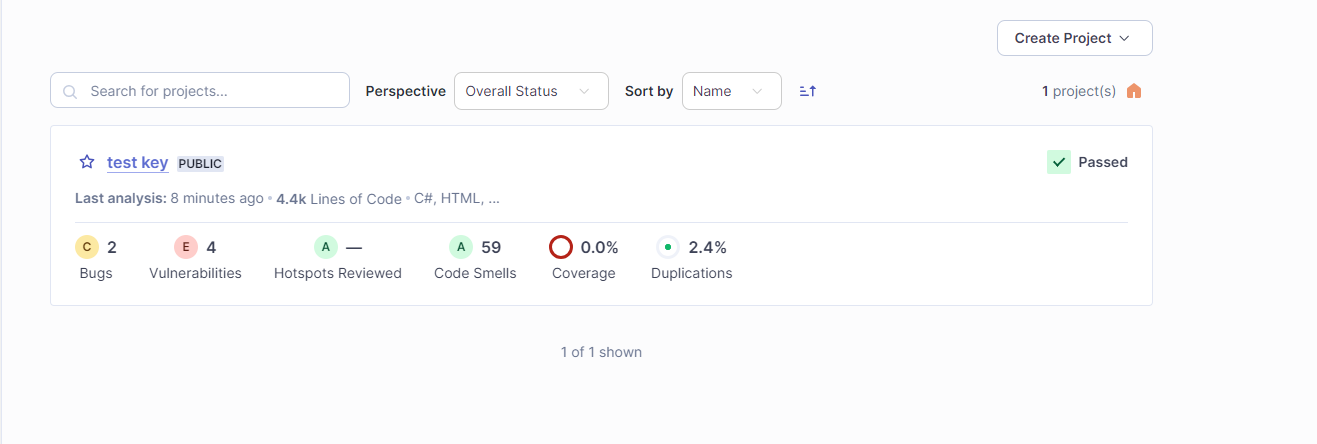
- After the above command runs successfully, you can check the results on your SonarQube project page http://localhost:9000/
Conclusion
SonarQube is a great tool for checking the quality of code and also supports more than 25 languages. I hope you have liked it and know about SonarQube and how to setup it in a local machine.


