How to disable Windows 10 Automatic Updates?
Introduction
Microsoft has made "Automatic Updates" mandatory for Windows 10 users to update their computer. The Microsoft has set the new operating system to automatically receive new updates by default. Windows 10 Pro users have an option to delay the updates they receive, but if you are on Windows 10 Home, there isn't much you can do about it.
Detail
Not only could it take a large chunk of data from your limited data plan, we have seen cases where an automatic update has caused issues in users' computer.
Regardless of why you want to delay or block Windows from automatically updating your computer, there are a couple of simple way that could do the job for you.
- If you are using Wi-Fi to access the Internet
- Disable automatic driver updates
- Using Group Policy Editor
- Disabling the Windows Update Service
If you are using Wi-Fi to access the Internet
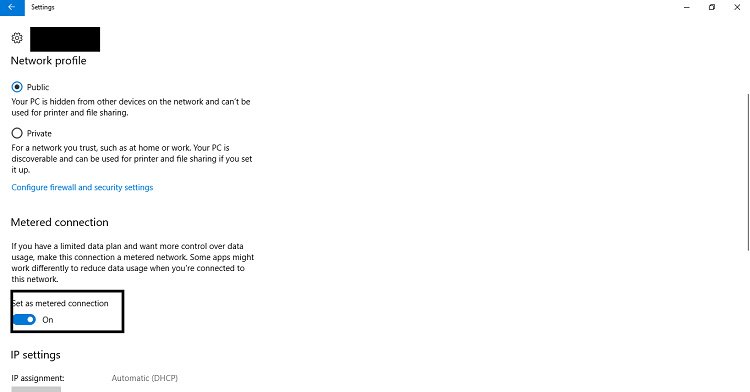
Interestingly, there is a simple option in Wi-Fi settings (Enable Metered connection), which if enabled, stops your Windows 10 computer from downloading automatic updates.
Follow the following steps:
- Open setting
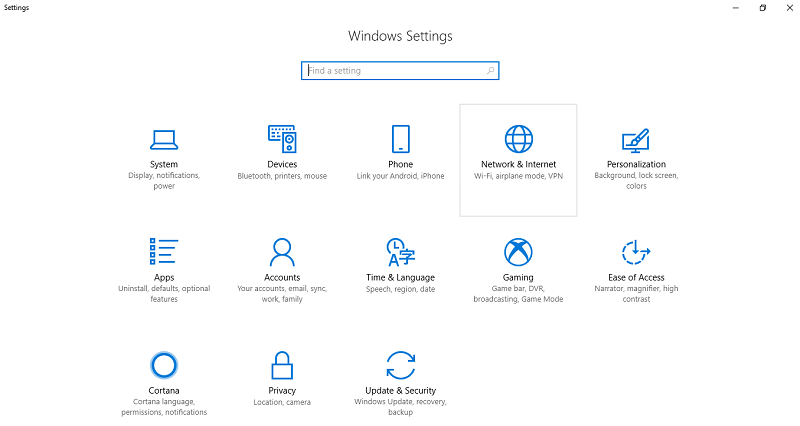
- Open Network & Internet and Select WIFI from left menu
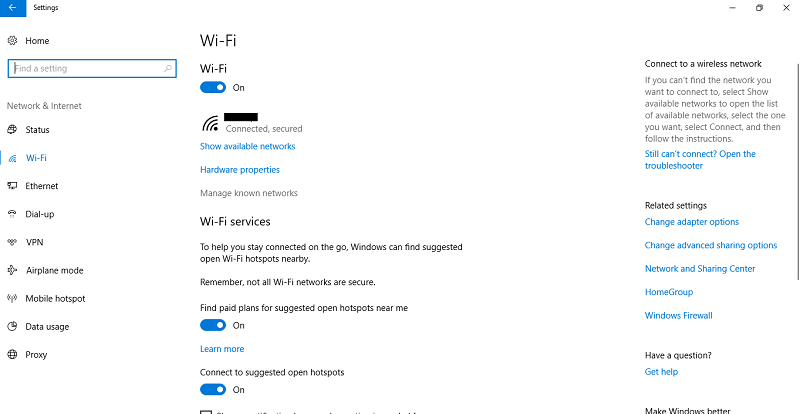
- Open Manage Known Networks and Select your network and open Properties
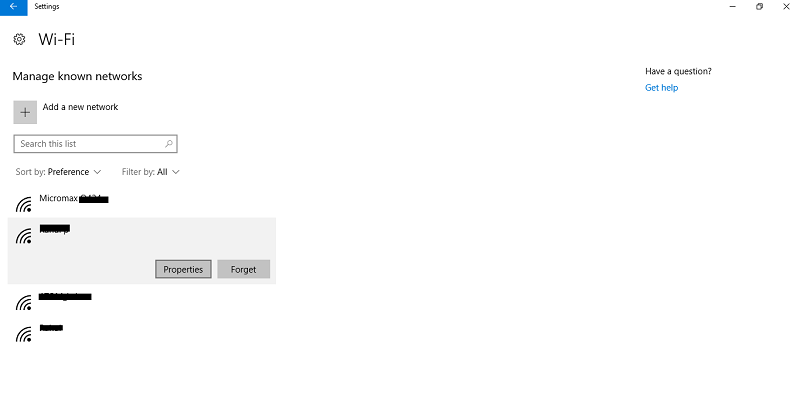
- Finally enabled the Metered Connection option
Disable automatic driver updates
You can stop it from automatically updating your device drivers.
To do this, right-click the Start button and click Control Panel.
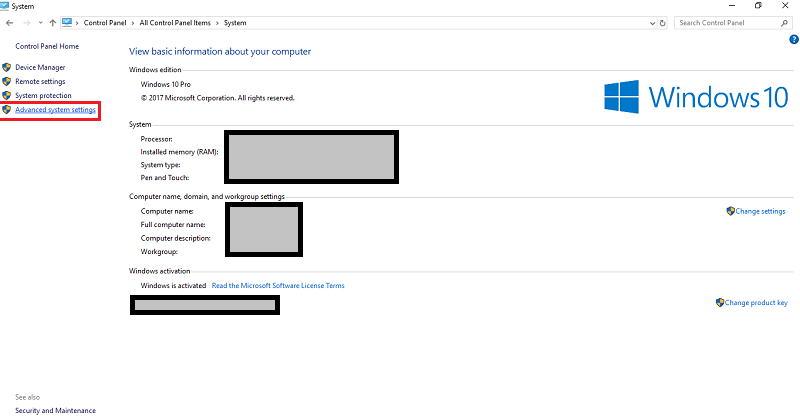
- In the Control Panel, go to System and click Advanced system settings to open the System Properties window.
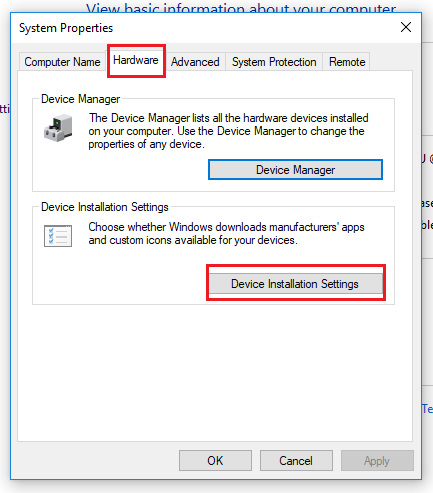
- Open the Hardware tab and click Device Installation Settings.
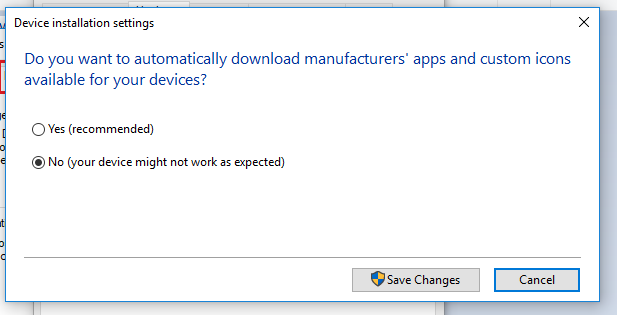
- When prompted with this message, click No and click Save Changes.
Using Group Policy Editor
In Windows 10, the automatic updates disabled option is invisible by default. You can enable a setting in Group Policy Editor to make this option show up and prevent your Windows 10 computer from downloading automatic updates.
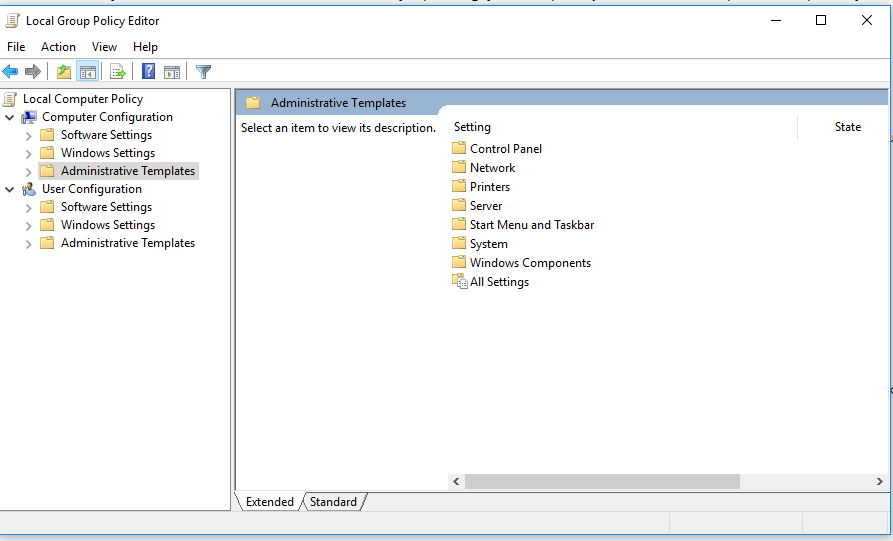
To open Group Policy Editor, go to Start Menu and search for gpedit.msc and press enter. Then follow these steps:
Click on Computer Configuration, and select Administrative Templates on the following page.
- Now select All Settings (double click) and scroll down the list to find the entry that says Configure Automatic Updates
- Double click on it and select Enabled radio button from the left upper side.
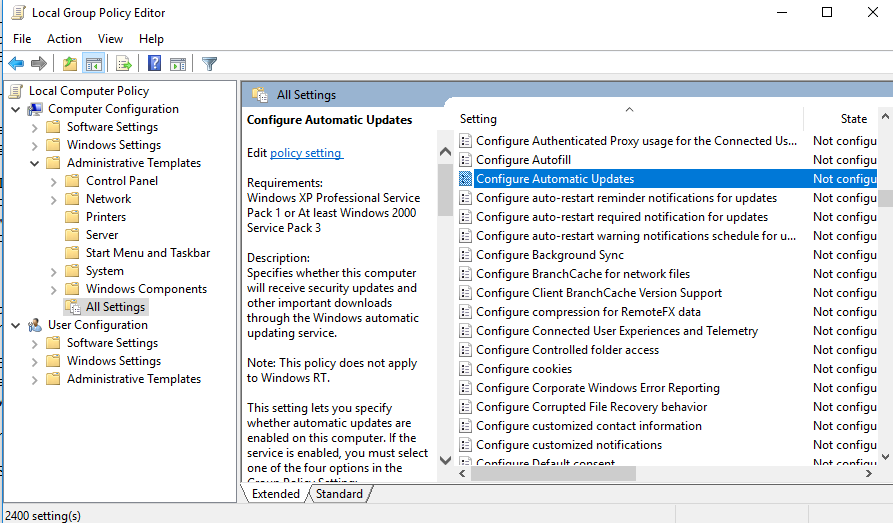
- Once you have done that, you could be able to edit the Options pane at the bottom
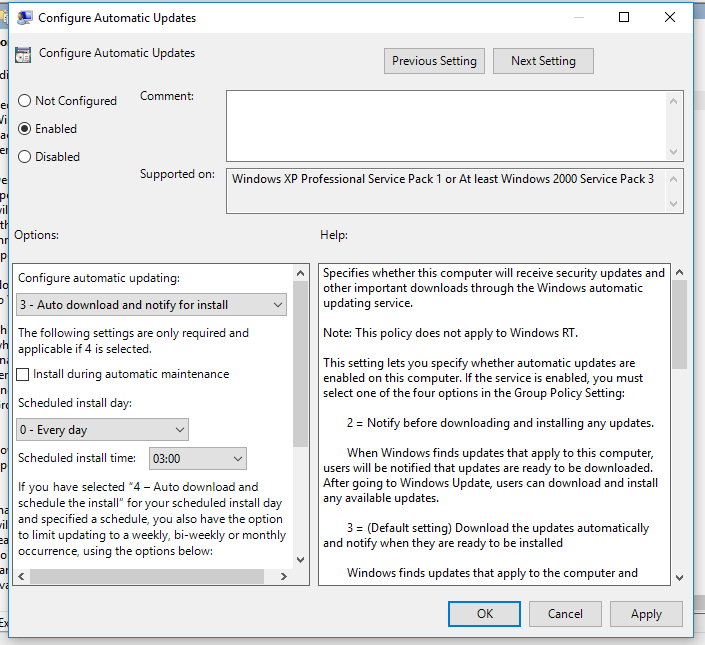
- Click the drop bar and select the fifth option that says Allow local admin to choose setting. Save it.
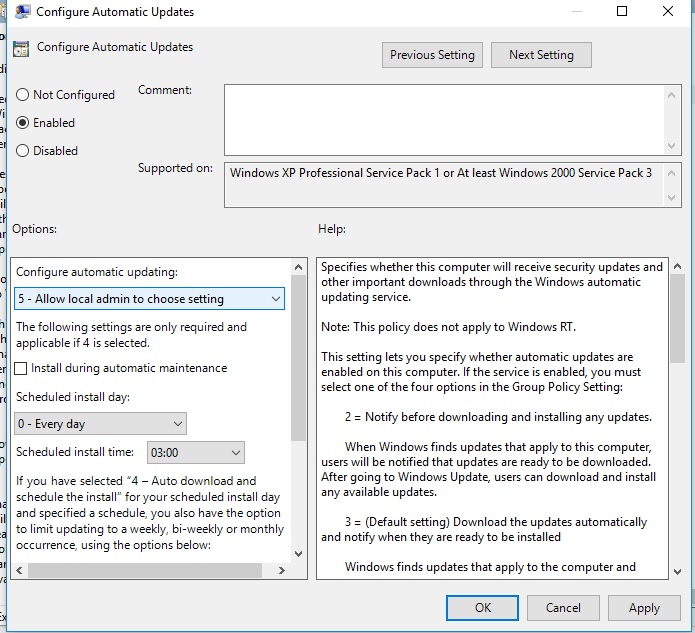
Now that the option to disable automatic downloads is available again, you need to go and select it.
- Go to Control Panel (desktop app), and select System and Security.
- Under that, click on Windows Update, and select Change settings on the following page. You will now see the option that says Check for updates but let me choose whether to download and install them. Select it and now your computer will check for updates, but never download or install them without your permission.
Disabling the Windows Update Service
We can disable the Windows Updates by disabling the Windows Update Service.
Control Panel > Administrative Tools, we can access Windows Services Manager.
In the Windows Services window, scroll down to Windows Update and turn off the Service. To turn it off, right-click on the process => click (Or double click) on Properties and select Disabled. Doing this, it will take care of Windows Updates not being installed on your machine.

Note: To be able to install the next set of features or a newer build, we will require the earlier updates to be installed. That’s why if we use the above workaround, we will have to go to the Windows Services Manager and turn it on once in a while to download and update your copy of Windows.
Conclusion
In the above discussion, we see how to disabled windows updates in windows 10. Hope it will be helpful.


Great!
Rashmi
25-May-2023 at 22:45